
Add Calculation Points_Stairs
|
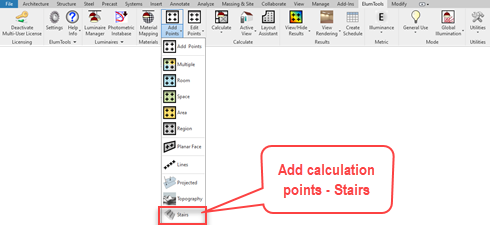
Another specialized variation of the Projected calculation points command places calculation points on Revit stairs (the category). This command can greatly simplify the requirement for points on treads in stairwells and can handle and entire sequence of multi-level stairs in one command.
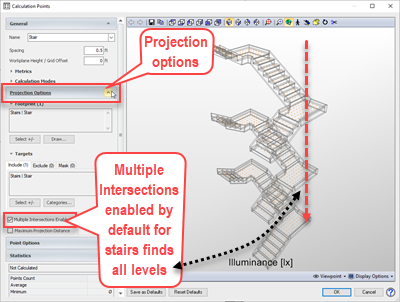
The Stairs version of Projected points will use Revit's stair geometry as a calculation boundary when projecting points downward. Using the Stair command, the "Multiple Intersections Enabled" checkbox in the Projection Options section is automatically enabled (see dialog discussion below).
|
|
|
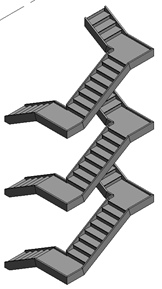
Consider the multi-level stair configuration shown here. Using the Stairs command we can add calculation points to the entire stair configuration in one step.
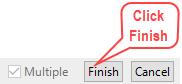
1. Select the command from the Add Calculation Points menu, 2. Click on the stairs. In this case the geometry is one multistory staircase. 3. Click the Finish button.
|
|
Calculation Point Dialog - Stairs
Once the stair objects have been selected, the Add Calculation Points dialog will appear for you to assign specific details to the calculation points. Typical input will be Point spacing and possibly a Workplane height should the points need to be elevated above the surface(s). By default, the illuminance Metric is selected and all Modes are active (General Use, Emergency, Daylight and Horticulture) for the grid of points. You can make changes if necessary by opening these sections of the dialog.
|
Specific details with regard to point locations can be accessed from the Projection Options section of the dialog.
Footprint - The Footprint section lists the stair elements used to create the boundary of the projection. You have the option to Select or Draw additional entities to be included in the footprint area using the buttons. This will return control to the drawing area to revise the selection.
Targets - The Targets sections lists the Revit Stair entities found by the projection footprint. The Targets section has three tabs: Include, Exclude and Mask. By choosing the appropriate action tab you have the ability to Select entities to be used for that action from the button. Actions can also be controlled by Revit Category.
|
Multiple Intersections checkbox - With this enabled the projection will continue to project through the initial surface contact encountering all additional stair surfaces below unless limited by the Maximum Projection Distance parameter (below). The default condition is selected for stairs. This feature may be combined with the Maximum Projection Distance checkbox described below to control the projection distance.
Maximum Projection Distance checkbox - By enabling this checkbox you can control the maximum distance a projection will cover thereby controlling the number of surfaces to be affected by the projected footprint. This is typically combined with the Multiple Intersections feature.
Details on all of the additional dialog settings such as Point Options (not projection specific) can be found in the general Add Calculation Points topic.
NOTE: The Stairs command is unable to find "stair" elements in linked models. Use the Projected Points command and select a footprint region for the same result.